Tuesday, March 27, 2012

In Progress Kitchen Remodel

We're coming to the end of our kitchen remodel and I'm so excited!

It looked like this when we bought it (not the best picture)

And this is what it looks like at this point...

Instead of the couch we now have an eat in kitchen nook!

 Looking at the pictures doesn't do it justice. Mike has worked his butt off (with his dad's help) and has completed a ton! I can't wait to see what it looks like when it's all finished!
Here is what they have done:
-build a new wall for extra studs and support for the new cabinets
-dry wall and putty
-prime the walls
-wiring/electrical
-hang and install upper and lower cabinets
-install up lighting and down lighting
-make bench
-add bead board
-add base boards and trim

What we STILL have to do:
-paint the walls
-paint all of the cabinets (the ones you see and the entire other side of the kitchen)
-paint the bead board and trim
-make a bench seat cushion and pillows
-knock out the kitchen sink and cabinet and move it directly under the window so it opens up the kitchen
-add granite
-get a new sink and hardware
-Roman Shade
-buy a table
-buy a rug
-buy 2 chairs
-get new flooring!! (we're probably going to add hardwood floors in the kitchen to continue what we already have so it flows AND it is 60% less expensive then tile... so the obvious choice is.... hardwood:))

We still have a long way to go but it's getting close! We'll be doing a lot of these things over the next few weeks and because next week is my Spring Break I'll be tackling some of these items on the To Do List!


Sunday, March 18, 2012

Inspiration Guest Bedroom

     Sooo... we just got the rest of our furniture settled into our guest bedroom and it' so exciting how different it looks not! It went from an empty box when we moved in, to Mike's hoarding room, to a guest bedroom!
    My mom and sister are coming into town this weekend and will be our first second guests! (Corey was our first guest last night... ha!!) I feel some pressure to get the room pulled together plus I'm super excited to get some color in that room and really make it it's own space! Here are some ideas I have for it...
I have this yellow paisley duvet already and love it!
I just ordered this from here

I already had these PB pillows
   I wanted to keep the guest bedroom calm but with more colors then tan and yellow. I new I wanted some greens and blues but didn't necessarily want to go with only those three colors. When I found this pillow I just loved it! It has the yellow to tie in the duvet as well as the blues and greens I wanted and to top it off it had a punch of color to give it some life. I hope it arrives (I only got one because...well because there was only one left) But that's perfect because I don't want to over do it with color I just wanted an accent that I could use to pull other accessories into that room.
    We currently have Mike's old dresser and night stand that are a set. They are a light oak color and one day I'd like to stain them a farmhouse brown stain to warm the room up a little bit and make them more sophisticated. We don't have a head board yet for the bed but I have some ideas for that as well.
love the idea of the old door/shutters


LOVE the rustic, clean, farmhouse look


We're going to make the head board ourselves which I can't wait for! I'm leaning more toward the rustic farmhouse headboard because I like the rich wood color with the contrasting vibrant cool colors in the room. What do you think? Clearly the room won't be finished this weekend for my mom and sister but I'm excited to start seeing things come together. 

 Bushel and a peck,

Kendayl


ps: the kitchen nook is coming along! I can't wait to post pictures when it's done!

Remembering...

    
Shirley Jennings Cooper
    One year ago today my Grandmother passed away. If you remember this post it explained how rough of a time it was. As I look back on this past year I can't even begin to explained how blessed I have been. There were so many times after my grandma passed away that I cried myself to sleep or woke myself up with anxiety. The love she showed our family was incredible. She was a tough cookie! It's been one year and while it's been a tough year because we've missed her it's always been an amazing year for my family. We've laughed and cried. We've found pictures and told stories that will never fade away. I wasn't able to go to Richmond this weekend to be with my family but my Aunts were there and it just shoes the values and family love she instilled in us all. While I caught myself today thinking about my grandma, shedding some tears because I won't have her at our wedding, and laughing at all the good times we shared I realize just how precious life is and just how important it is to cherish your family. 
    One of the greatest joys she instilled in our family is to love one another no matter what. She used to always say "I love you a bushel and a peck and a hug around the neck"... hint the name of our blog. We say it to each other often and each time I say those words or hear them I get a smile on my face because I know that even though she may be in heaven and not here with us her words, love, and dedication to family lives within forever. 


She was there with us on our BIG race day too!


Bushel and a peck, 

Kendayl


Monday, March 12, 2012

pancakes

Almond Flour Pancakes that are OUT-of-this-WORLD!

photo courtesy of Heather Eats Almond Butter


Ingredients:
  • 1/2 cup blanched almond flour
  • 1 egg
  • 1/4 cup seltzer water (hence the Extra Fluffy) (can substitute with water or nut milk)
  • 1/4 tsp baking soda
  • sweetener to taste (I used 1 tsp. or so of Agave Nectar)
  • 1 tsp cinnamon
  • 1/2 tsp vanilla
  • Pinch of sea salt
  • 3 egg whites
Directions:
  • Stir together all ingredients except egg whites.
  • Whip egg whites until white stiff peaks form and then fold them into your pancake batter.
  • Fry pancakes over low heat in a greased skillet or on a pancake griddle.
   It took me a few tries to get the heat just right so I didn't burn them but so that they cooked enough to flip. Once you figure it out they turn out amazing! I was even able to flip them without the spatula just like a real chef!! (whoop!) 
  I made them tonight after dinner for Mike's breakfast in the morning and they started disappearing before they made their way into his tupper ware (oops!).
   Super quick and easy to make! I'm saving some of the batter for later in the week so it's one less thing I have to do!


bushel and a peck, 
Kendayl

Sunday, March 4, 2012

Bacon, Kale, and Mushroom Stuffed Acorn Squash

Gluten free and Paleo... and AMAZING!!!!  I was searching for some new recipes this week and came across this one and had to make it for two reasons... 
1. I already had an acorn squash that needed to be used
2. It sounded scrumptious!

Bacon, Kale, and Mushroom Stuffed Acorn Squash

Cooking Steps                                          

Preheat oven: 400 F
Prepare acorn squash by slicing in half and removing seeds. Place 1 tsp of coconut oil in each cavity and massage. Season with salt and place in the oven for 40 minutes.On medium heat, cook bacon until crisp. Poor off bacon fat, but keep roughly 2 tbsp on reserve in the pan. Throw in sliced mushrooms and saute plus 1/4 cup of water to remove the bacon goodness left on the bottom of the pan. (I used Turkey Bacon and added onions and an orange pepper)
While mushrooms are cooking, prepare kale by removing stalks and chopping leaves. Bacon should be cooled by now, so go ahead and chop that up too.
Most of the liquid should be evaporated from the mushrooms. Add kale and bacon to pan with mushrooms plus another 1/4 cup of water and thyme, and saute until kale is tender. Once done, set aside and wait for timer to finish on squash.
Remove squash from the oven and evenly fill cavities with bacon, mushroom and kale. Place back in the oven for 15 minutes.
Squash is done when flesh is tender when poked with a fork.

Did somebody say Pizza?!

PizzaBar

   I've been craving pizza lately and wanted to find a healthier, gluten free pizza crust recipe that wasn't too complicated. Low and behold I found one! Not only is it gluten free, healthier then normal crust, but it's paleo approved! Since I can't eat things with gluten in them it throws out a lot of things you "can't" eat while eating paleo. So, Mike and I are testing out some paleo recipes and seeing how it goes. I'm still eating yogurt and cheese but I'm trying to see if I can cut out the legumes, rice, and corn. That's going to be hard because when I first started going gluten free those were yummy carbs that I could still eat. However, I'm going to see how it goes and see how I feel. Now, if I'm out at a BBQ, party, etc. and those items are there I'm not necessarily going to avoid them but I'll try and pick some alternatives as best I can. :)

Non gluten free pizzas


<--These turned into, these-->


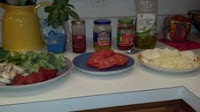
Ok... back to the pizza! We had our friends Regina and Antonio over for dinner so I came up with the idea of having a pizza bar. Everyone likes their pizza's dressed up differently so I wanted to give everyone that chance to make it just the way they like it. I had Flatout bread for those who didn't want to experiment with the gluten free/paleo options.  I also made an almond flour pizza crust and let me just say it was DELICIOUS! It calls for 2 cups of almond flour and I couldn't find my 1 cup measuring cup so I used my 1/2 cup and forgot I did so when I put in the "2 cups" of flour and started stirring it didn't seam thick enough so I started to slowly add more flour. However, then I reread the recipe and realized that I had been using the 1/2 cup instead of the 1 cup so of course my measurements were off! Oops! It still turned out so good but I think next time if I followed it correctly it may have not been as crispy. I found the recipe here and it looked flavorful and very simple. And it was!


Everyday Paleo Pizza
Crust:
2 cups almond meal
2 eggs
3 tbsp olive oil
¼ tsp baking soda
1 tsp garlic powder (I used more because I love garlic!)
1 ½ tbsp fresh rosemary chopped (I used dried rosemary because it's what I had... and I used more!)

Preheat your oven to 350. Using a spoon mix all crust ingredients together until it becomes very thick.  Using your hands, form the dough into a ball.  Lightly grease a pizza pan or a cookie sheet with olive oil.  Place the ball of dough in the center of your cookie sheet or pizza pan and using your hands, push and pat the dough down into the shape of a circle (or an oval in my case…).  You want to make the dough as thin as possible.  Your pizza will be about 12 inches across.  Bake JUST the crust in your pre-heated oven for 20 minutes.  While your crust is cooking, prepare your toppings.  If you use sausage like we did, this is when you should crumble it into a large saute pan and brown.  After the crust if done, remove from the oven and evenly spread the marinara sauce over the crust.  Add the sausage and all remaining toppings evenly over the sauce and bake again for an additional 25-30 minutes.  Get creative and use whatever toppings you might like – ours was great but I also suggest trying chicken, artichoke hearts, and even broccoli!!  Go wild with it and as always: Enjoy!

I also chose to make a cauliflower crust. Yes you heard me right...cauliflower! Before you stop reading and say "Kendayl that is disgusting" just wait. I was terrified to try it especially with friends coming over but I tried it anyway. I'm so glad I tried it because it was INCREDIBLE! Of course it doesn't taste like regular pizza crust but my golly it was tasty! It had so much flavor, it was moist, easy to make, and so light! I could have eaten the whole pizza if I was dared to but I wanted to be polite for our "guests". (ha sike!) I found the recipe here.
Cauliflower Pizza Crust
-Just use a cheese grater to “grate” your cauliflower into very small pieces. You can grate a whole large head of cauliflower and make two 9-inch pizzas.
 -Microwave those cauliflower crumbles for 8 minutes. No water or anything needed. Just microwave it for 8 minutes to soften it up, and then let it cool a little bit.  See the recipe below for how to proceed if you do not have a microwave.
-Mix 1 1/2 cups of the cauliflower crumbles with egg, cheese and spices. (I used mozzarella, but imagine using different varieties of cheeses in the crust! Yum!)

Use your hands to make it flat and into a pizza shape
Mozzarella, sun dried tomatoes, and spinach

-Shape it into a 9 to 12-inch round. Bake the crust. Top it with desired sauce and toppings.


Like I said I was reluctant to try something new with an American favorite but I'm so glad I did! Obviously it isn't the same as real greasy, yummy pizza crust BUT it's an awesome alternative and you get full and you won't feel guilty afterwards!


Any good recipe alternatives you've tried? Let me know!


bushel and a peck, 
K


Thursday, March 1, 2012

1 week in...

So far...so great. Since I'm pretty convinced there isn't a man who reads this blog...I'll go here. Even though I'm on my period this week...I feel way less bloated. It's amazing. 1 week without carbs or starches and I am already feeling a difference.

All week long I've been listening to the Paleo Summit: http://paleosummit.com/denise-minger/
Great information both for and against the Paleo Diet. Really interesting information.


Let's not kid ourselves: On Wednesday, I would have killed for a bowl of pasta. Thankfully, I had given all my pasta boxes, crackers and pretzels to my boss so the house was still a safe zone :)

But today when I woke up - I was feeling a little icky, a little like I was on my period but I still dared to get on the scale...down another 1.3 pounds!! Seriously, how does that happen?

I've also noticed that I'm more excited about getting in the kitchen. On Monday, I made Enchilada Chicken in the crock pot - 3 pounds of chicken, 1 can of diced tomatoes, a onion, peppers, jalapenos and whatever spices I liked - pepper, cumin, garlic, red chili flakes and 8 hours later...YUMMM.

Tonight I made pulled beef. I took about a 2 pound chuck roast, 1/2 cup of chicken stock, veggies, spices and 8 hours later...AMAZING.

Lesson: if nothing else comes out of this but me learning to cook in the kitchen - I think it'll be a success.

And so far...no working out yet because of my knee. Pretty awesome.

Oh yeah...Matt is down 12 pounds. That devil.